Shucking a Hard Drive
A cost effective way to source large capacity hard drives for cheap!


Companion Video: Watch Here
shuck/SHək/
noun - an outer covering such as a husk or pod, especially the husk of an ear of corn.
verb - remove the shucks from corn or shellfish. "shuck and drain the oysters"
Much like an Oyster we are cracking open a shell to get to the meat inside. Only in this case, the meat is a Hard Drive and the shell is plastic.
Buying an External Hard Drive
First you'll need an External Hard Drive. I personally use https://shucks.top/ to find the best deal or to compare and see how a deal stacks up. Unfortunately, Amazon just removed their API so their prices are no longer showing but it's still a great place to check and use their data to make an informed decision about your purchase price.
Before you shuck your hard drive, you should be aware of a few things:
First, this will void your warranty of the hard drive. I have heard of people successfully re-enclosing their failing hard drive and sending it back for warranty but I personally haven't attempted or had any issues in which I would need to claim warranty.
Second, Due to the previous point - there is a chance you can receive an enclosure that has been shucked already and the inside hard drive has been swapped with another. Be cautious if you receive one that seems like it might have been opened previously.
Third, BEFORE shucking you should connect it to your PC to verify function, capacity, and hard drive information. You can use a tool like Crystal Disk Info to check deeper if it seems opened but if it is seemingly brand new you can get away with just checking your OS' Disk Manager.
Fourth, Hard drives that run in an external enclosure tend to run hotter than they do inside of your PC (with adequate fans). If you are on a system like Unraid that would require a PreClear - I would recommend doing so with the enclosure over a fan on your PC case (ie. top exhaust or front intake) to keep air moving.
Disassembly
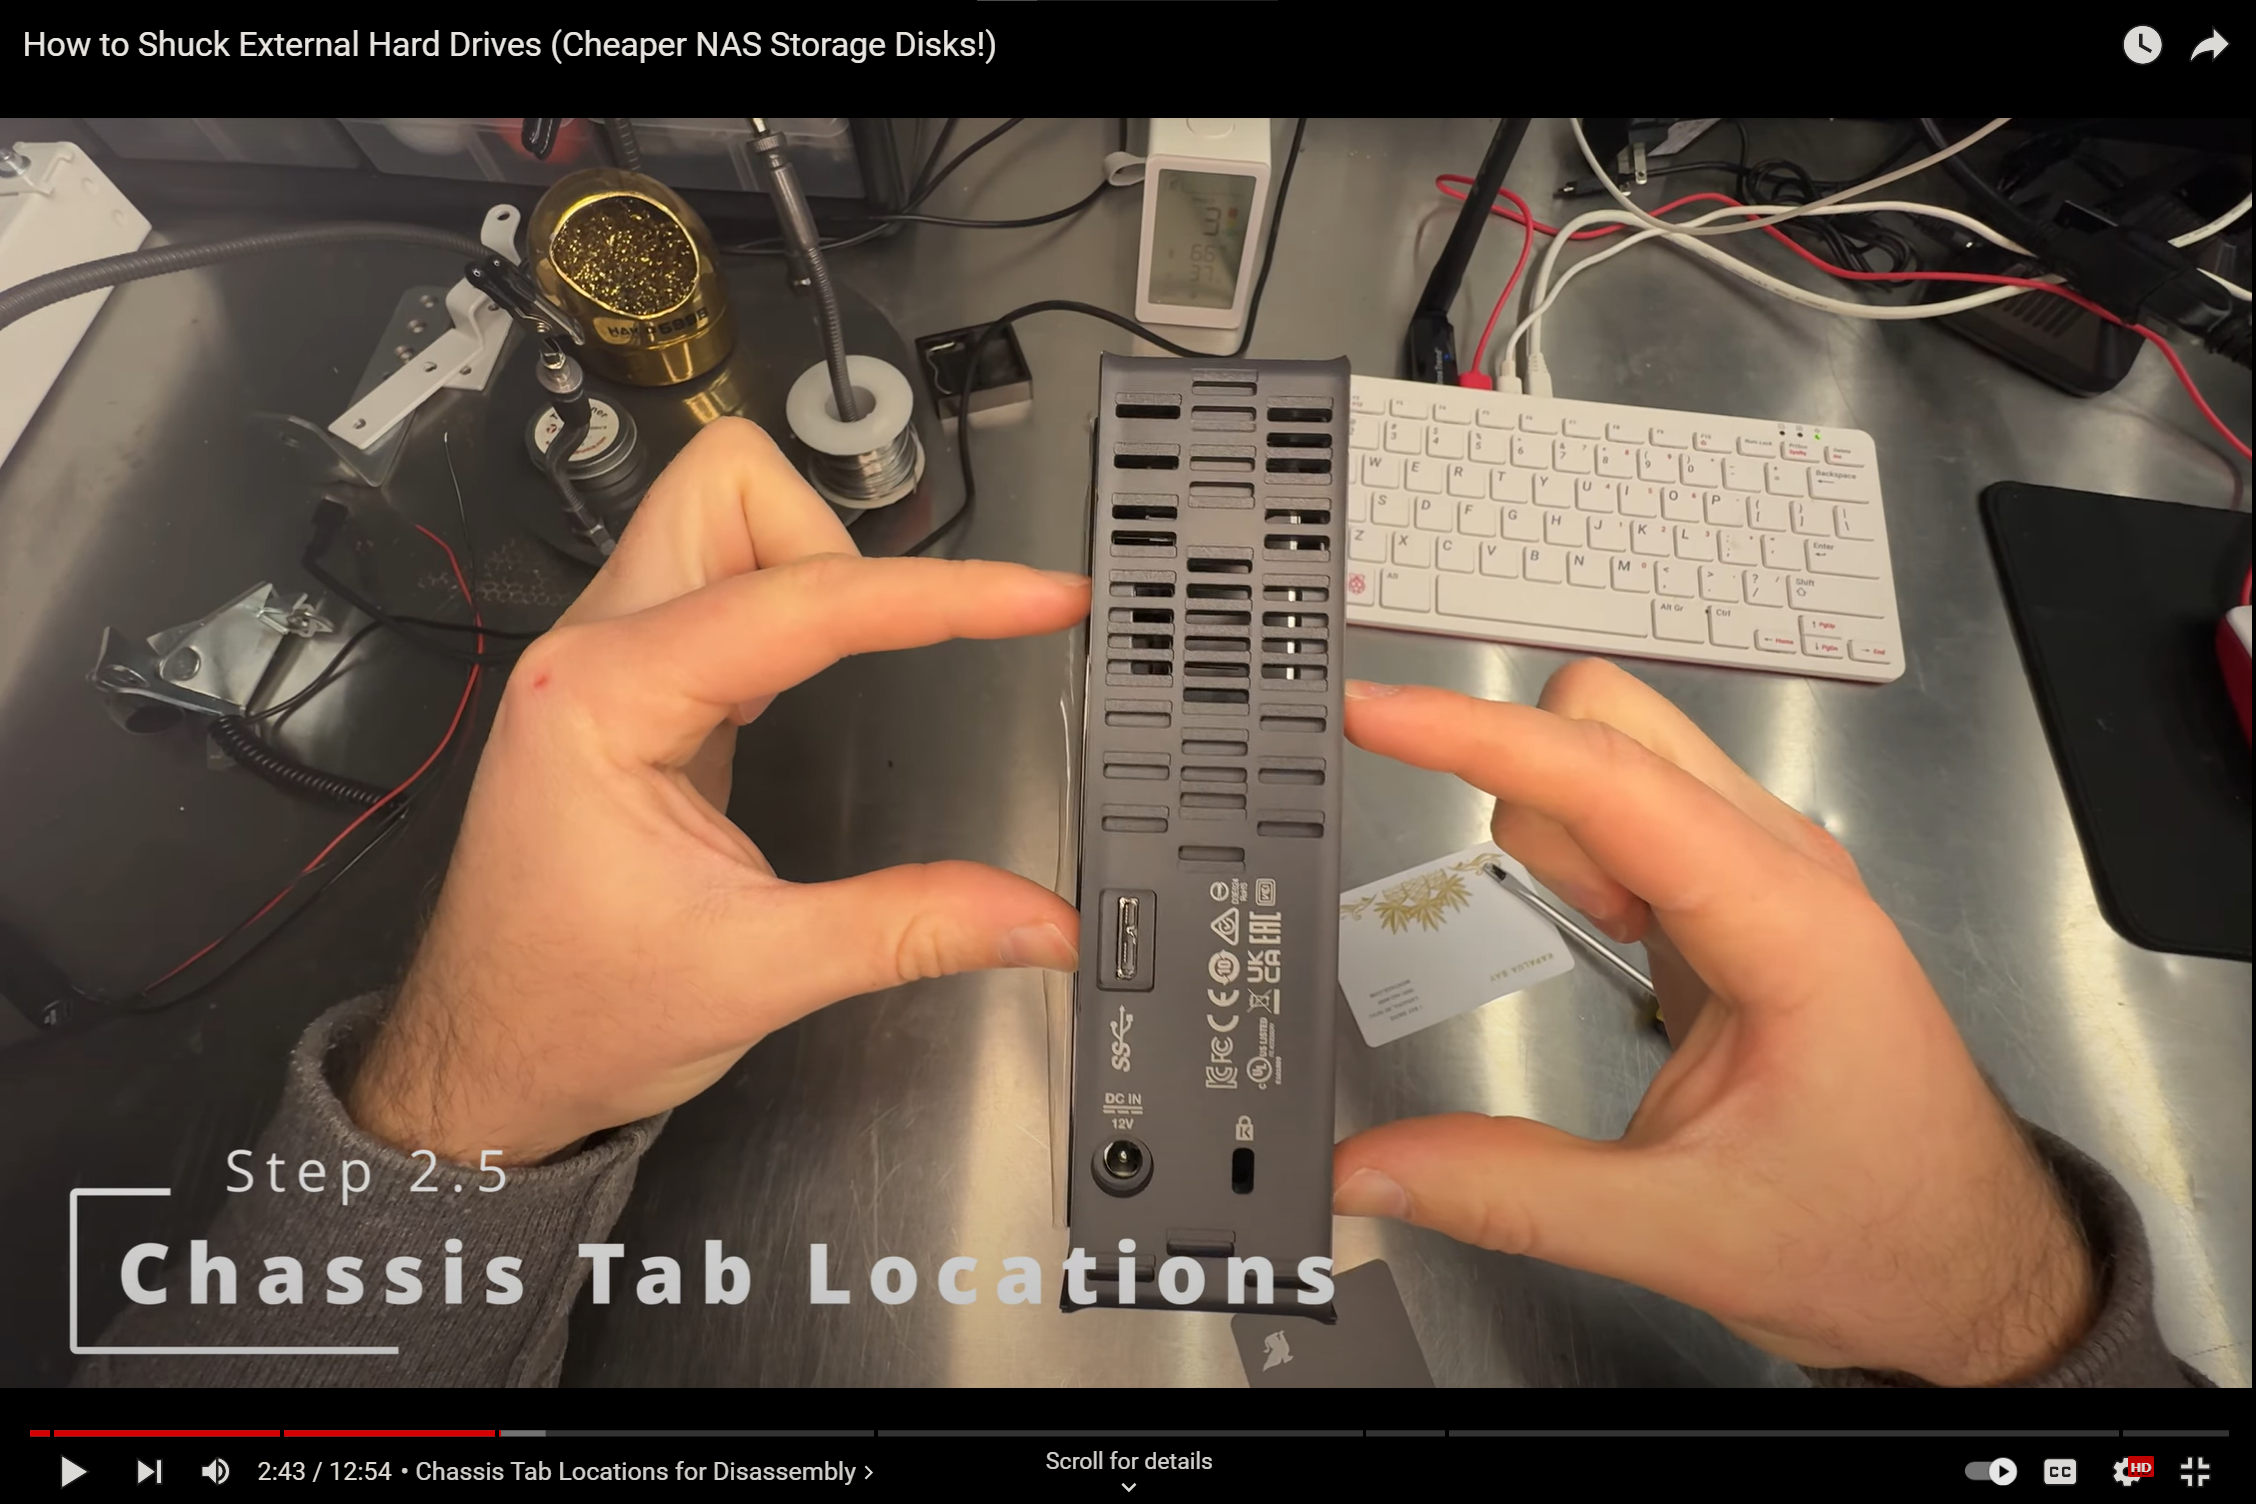
Once you verify the drive inside is what you think it is (correct brand, capacity, no SMART errors, zero or low Power On Time), you can begin with the disassembly. If you don't plan to reuse the enclosure you can simply rip apart the front of the enclosure from the middle/rear portion with your hands or a screw driver. If you DO plan to reuse the enclosure, you can use two credit cards or old hotel key cards to slide in-between the plastic and separate the clips.
Below, my fingers are pointing to the locations of the tabs - so insert your cards near there.
Once the chassis has been removed, you can angle the hard drive to simply pull it outside of the enclosure.
With the Hard Drive removed, you can unplug the data and power board that is connected to the drive and remove the rubber mounting feet with a torx screw driver.
At this point you are functionally done. A large number of people will be able to plug this right into their PC and have it boot right up.
However, if you don't see the drive in your BIOS or in your disk management tool - you may need to cover the 3.3v pin.
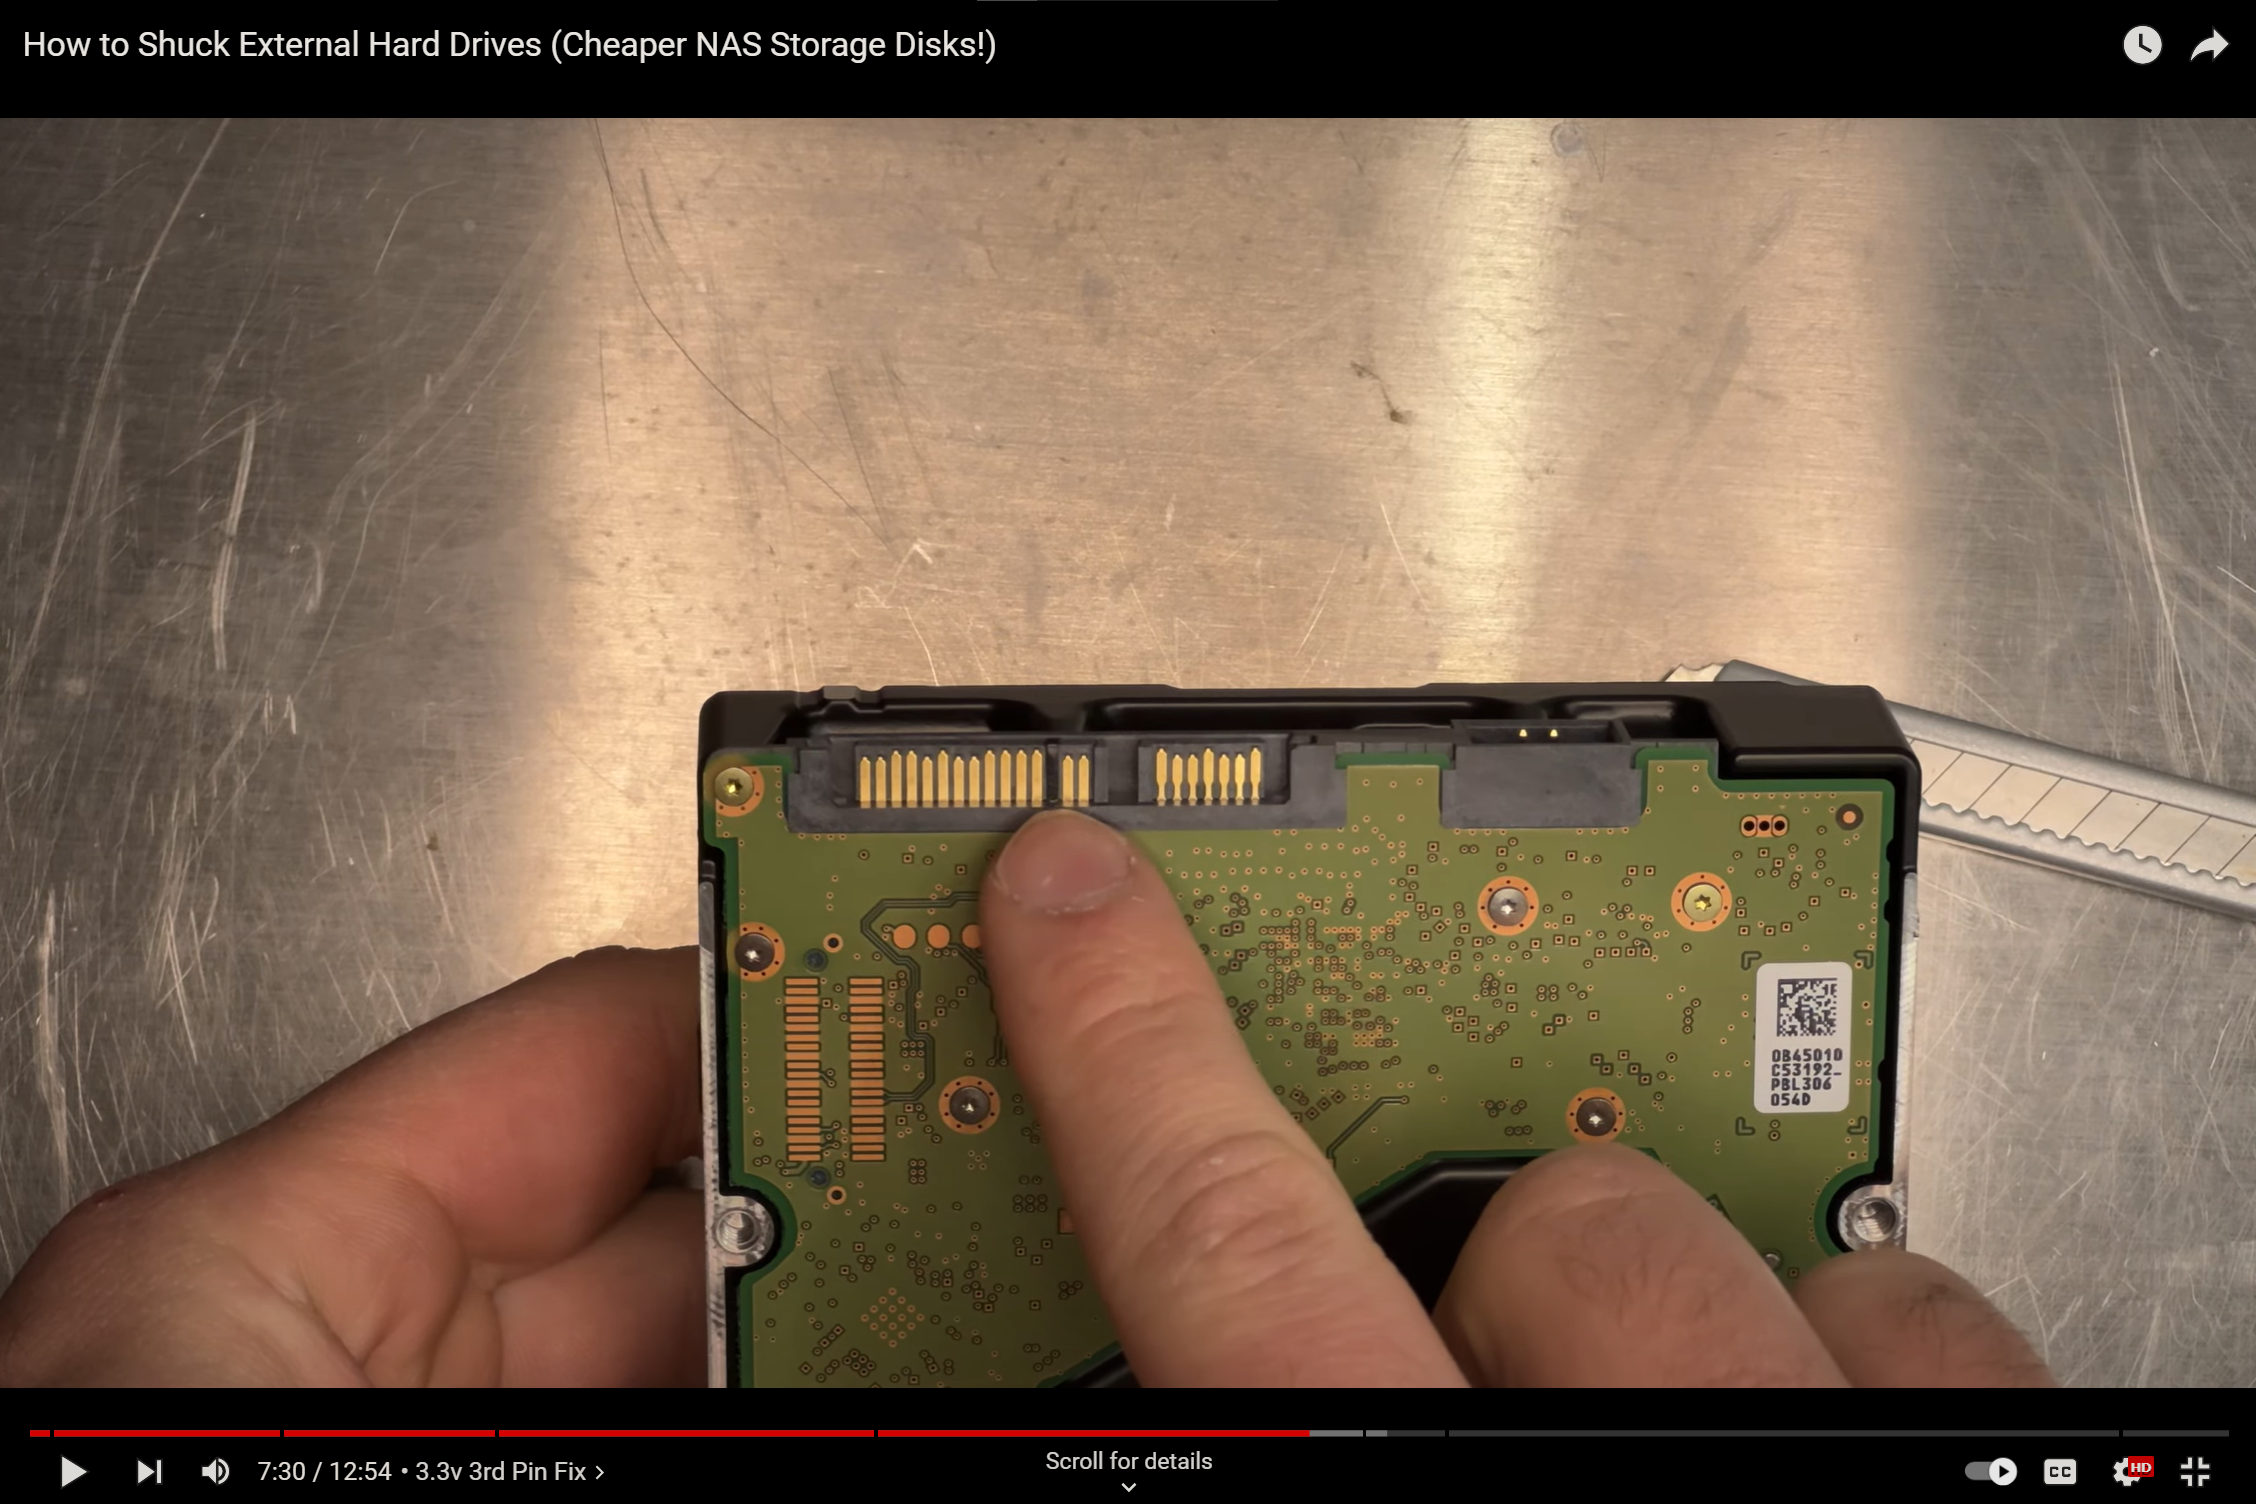
The 3.3v 3rd Pin
The 3rd pin on the Power Connector for the Hard drive is the 3.3v pin. On some hard drives, when this pin receives a current of 3.3 volts it tells the drive to spin down and turn off. I have had different results with different power supplies and different shucked drives over the years so I can't say for certain how to tell this is a problem without simply plugging it in and checking your it.
Luckily, it's an easy fix. We just need to cover that pin. Some people opt to remove the pin, which seems a bit destructive to me so I tend to cover it with electrical tape - as I have that laying around. The correct tape would be 3M Kapton tape - which is super thin, super sticky, and electrically inert. I have had no issues with electrical tape but if you are worried about "doing it right" feel free to buy the Kapton tape.
Amazon Affiliate links for tapes:
Generic Polyimide Tape : https://amzn.to/480L3nz
3M Brand Kapton Tape: https://amzn.to/428LUB0electrical
Duck Brand Electrical Tape: https://amzn.to/47Obtsp
Using a knife, scissors, or something sharp - cut a very thin strip of tape to cover the 3.3v pin. The power connector will do a good job of keeping it place, so it is not imperative that you get it perfect - but you want to be sure you aren't covering any other pins or leaving any of the tape exposed for dust or other components.
Troubleshooting
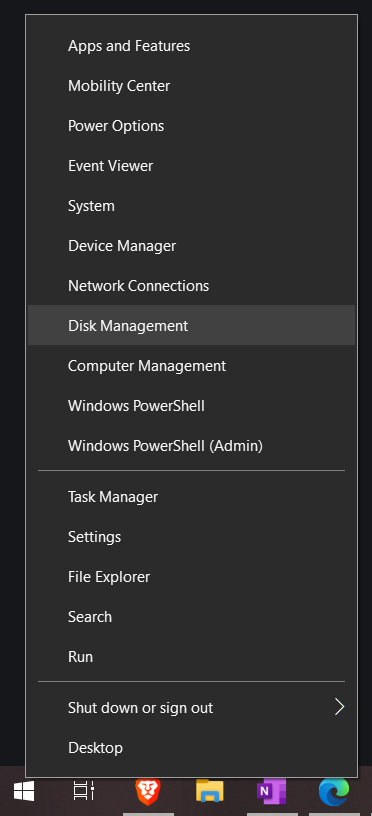
If it doesn't show in Windows "My Computer" immediately after booting - you could likely need to format the drive and change it's type to be recognized by your OS. I can't recall what format it is in when it ships but it's a good idea to partition it yourself anyways to ensure it is clear.
To do so, Right-Click your start menu, then click on "Disk Management"
Then identify the disk (I don't have a blank disk attached at the moment)
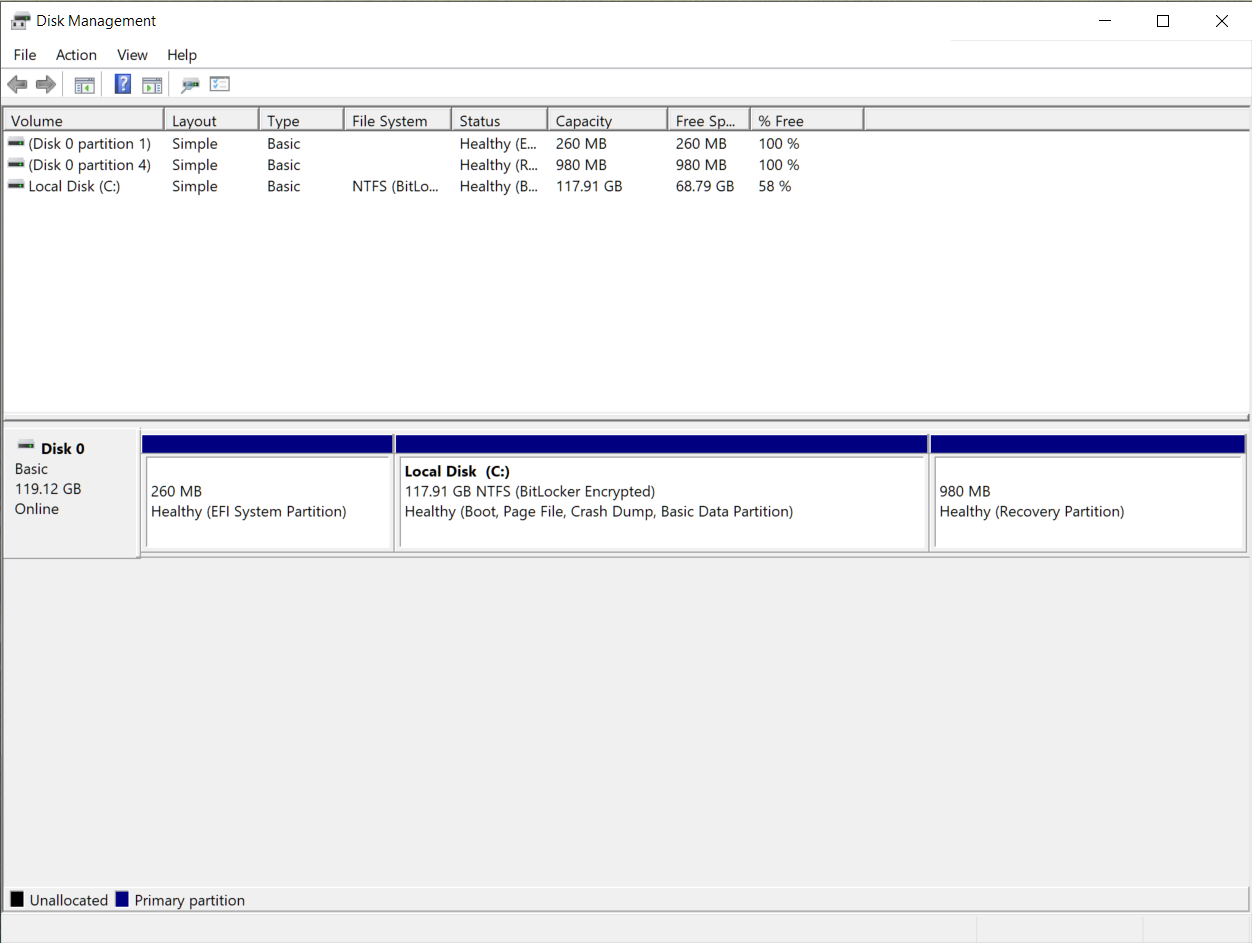
At which point you can right click it and delete or create partitions.