How to Install HomeAssistant on a Raspberry Pi 4 with an SSD (and Argon One Case)

This is the written companion to my Youtube video on How to Install HomeAssistant on a Raspberry Pi 4 with an SSD (and an Argon One Case).
Consider an Alternative
Before we get started, I want to let you know what I do not feel that the Raspberry Pi 4 is the -perfect- Home Assistant host. If you already have a Raspberry Pi that is laying around, absolutely go for it. If you are buying a Raspberry Pi 4, specifically for installing Home Assistant. I would urge you to check the prices of alternatives such as the Dell Optiplex covered here.
At the time of this writing, Raspberry Pi 4's are hard to find, being sold for more than double MSRP, require additional hardware, and have less processing power than alternatives. The Raspberry Pi is immensly popular product but I do not feel it is the catch all solution for HomeAssistant that some make it out to be.
For a more in-depth walk through of considerations please check out my video:
Shopping List:
In case you need to order your hardware, the below links are Amazon Affiliate links where I will earn a small comission. Thanks for your Support!


I STRONGLY recommend that you install HomeAssistant onto an SSD when using a Raspberry Pi. HomeAssistant will be reading and writing onto your MicroSD Card 24/7 and will kill it within a year - sooner if you have a lot going on in HomeAssistant.
Due to this SSD requirement, there are TWO methods that I cover on how to install Home Assistant onto the said SSD. The Method that is right for you, comes down to how your SSD connects to your Raspberry Pi. If you have a Raspberry Pi Enclosure such as these below that you can connect to your PC, you can install Home Assistant directly onto the drive.
As an Amazon Associate, I earn from qualifying purchases.

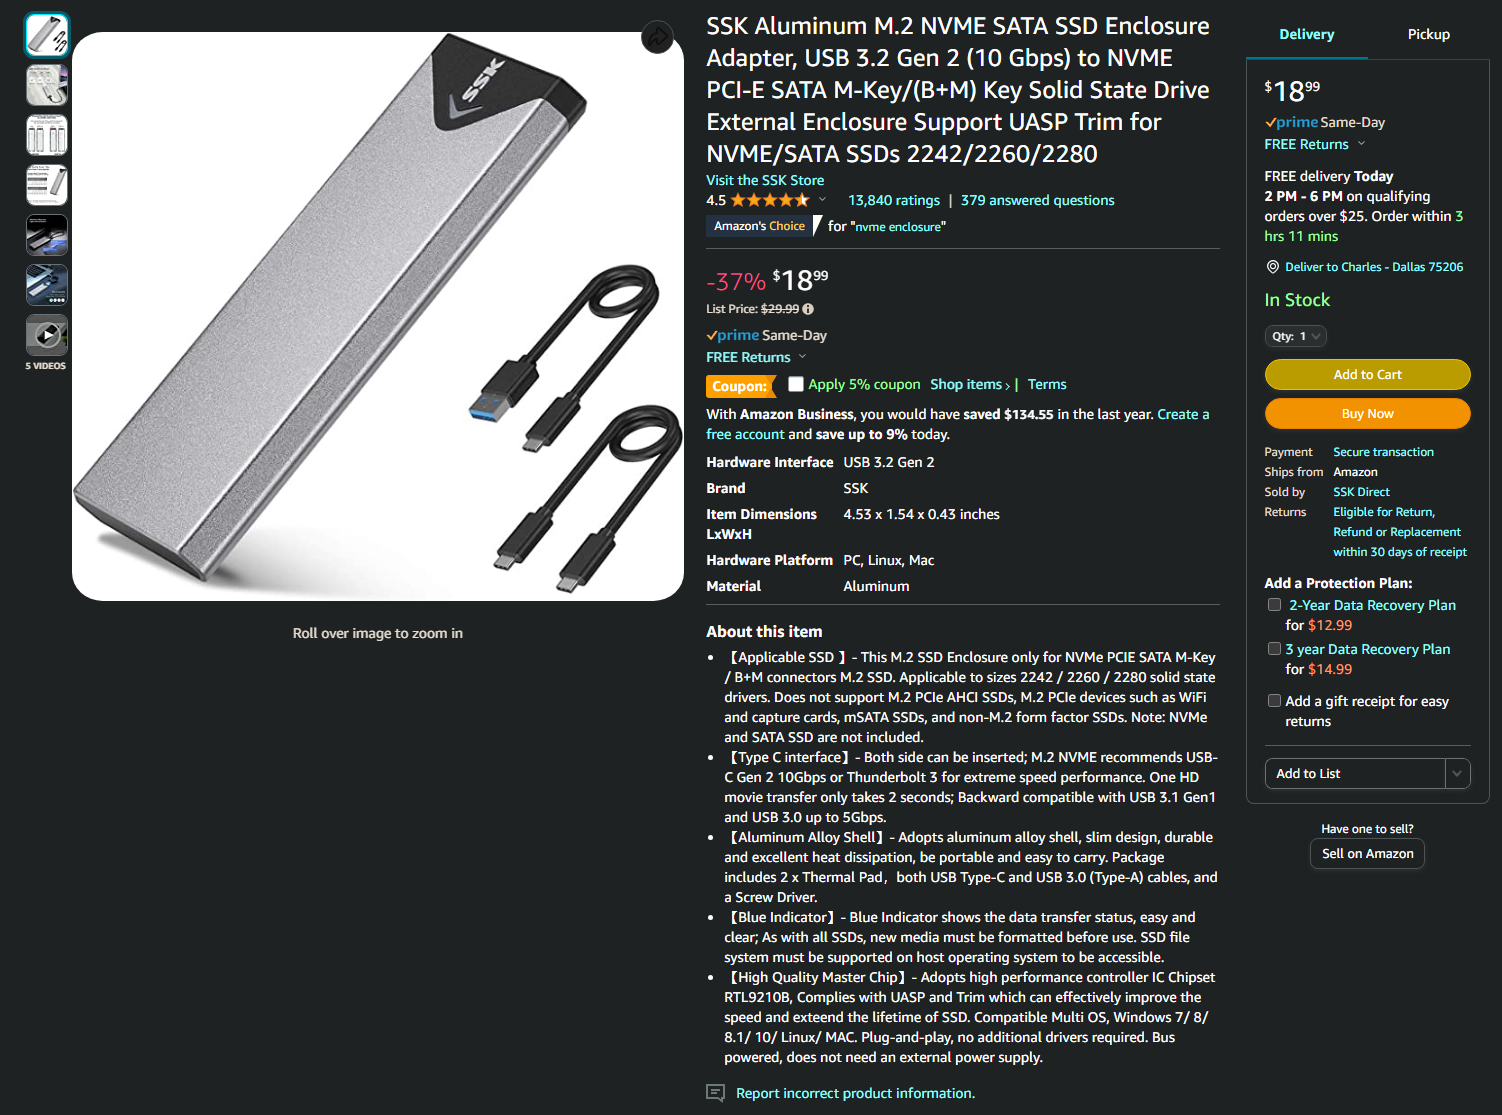
SSK Aluminum M.2 NVME SATA SSD Enclosure Adapter
USB 3.2 Gen 2 (10 Gbps) to NVME PCI-E
Whereas, if you have an enclosure such as the Argon One, you will not be able to connect it to your PC easily or for free.

Depending on your type of case, you will need to purchase a corresponding SSD. The Argon One requires a SATA SSD where as the NVME to USB enclosures require an NVME. They are all M.2 size format so please double check!


Installation Steps
Method One - Unable to connect SSD to PC directly
First -
Download the Raspberry Pi Imaging Software
Second -
Using the Raspberry Pi Imaging software, write the "USB Boot" Operating system on to your connected MicroSD Card via your MicroSD to USB Adapter.
After this has been written, put your MicroSD Card into your Raspberry Pi and turn it on.
Wait a moment until the Screen turns Green.
You can now remove the power from your Raspberry Pi and remove the MicroSD Card.
Third -
Connect your MicroSD card to your PC again and open the Raspberry Pi Imaging Software.
Click the Gear Icon and set a Username and Password. Additionally, you can put your wifi settings in by clicking the gear icon before writing or you can do it later from within the OS.
Click Save
Then write the Raspberry Pi OS onto the MicroSD Card
Fourth-
Once the Imaging software has completed writing the OS onto the Micro-SD Card, Eject the MicroSD Card from your PC and MicroSD to USB Adapter.
Connect the MicroSD card with Raspberry Pi OS to your Raspberry Pi.
Turn on the Raspberry Pi and Let it boot
Fifth -
Once you are Booted into Raspberry Pi OS, Connect your SSD to the Raspberry Pi.
Open the Raspberry Pi Imager within the Raspberry Pi "Start" Menu > Accessories > Imager
Choose Operating System > Other Specific Purpose OS > Home Assistants and Home Automation > and then Choose the Appropriate Home Assistant OS Image for your version of the Raspberry Pi.
Sixth-
Once the Image has been written onto the SSD, Turn off the Raspberry Pi.
Remove the MicroSD Card.
Turn the Raspberry Pi back on....
And it should boot into Homeassistant for you.
You're Done!
Method Two - Able to Connect to SSD from PC
First -
Download the Raspberry Pi Imaging Software
Second -
Connect your SSD to your PC and open the Raspberry Pi Imaging Software.
Choose Operating System > Other Specific Purpose OS > Home Assistants and Home Automation > and then Choose the Appropriate Home Assistant OS Image for your version of the Raspberry Pi.
Third -
Once the Image has been written onto the SSD, Remove the SSD.
Fourth -
Connect the SSD to the Raspberry Pi and turn it on.
Let it boot into Home Assistant.
You're done!
Now that you're booted into HomeAssistant check out my other content and videos for what to do next to improve your smart home experience!